Data table
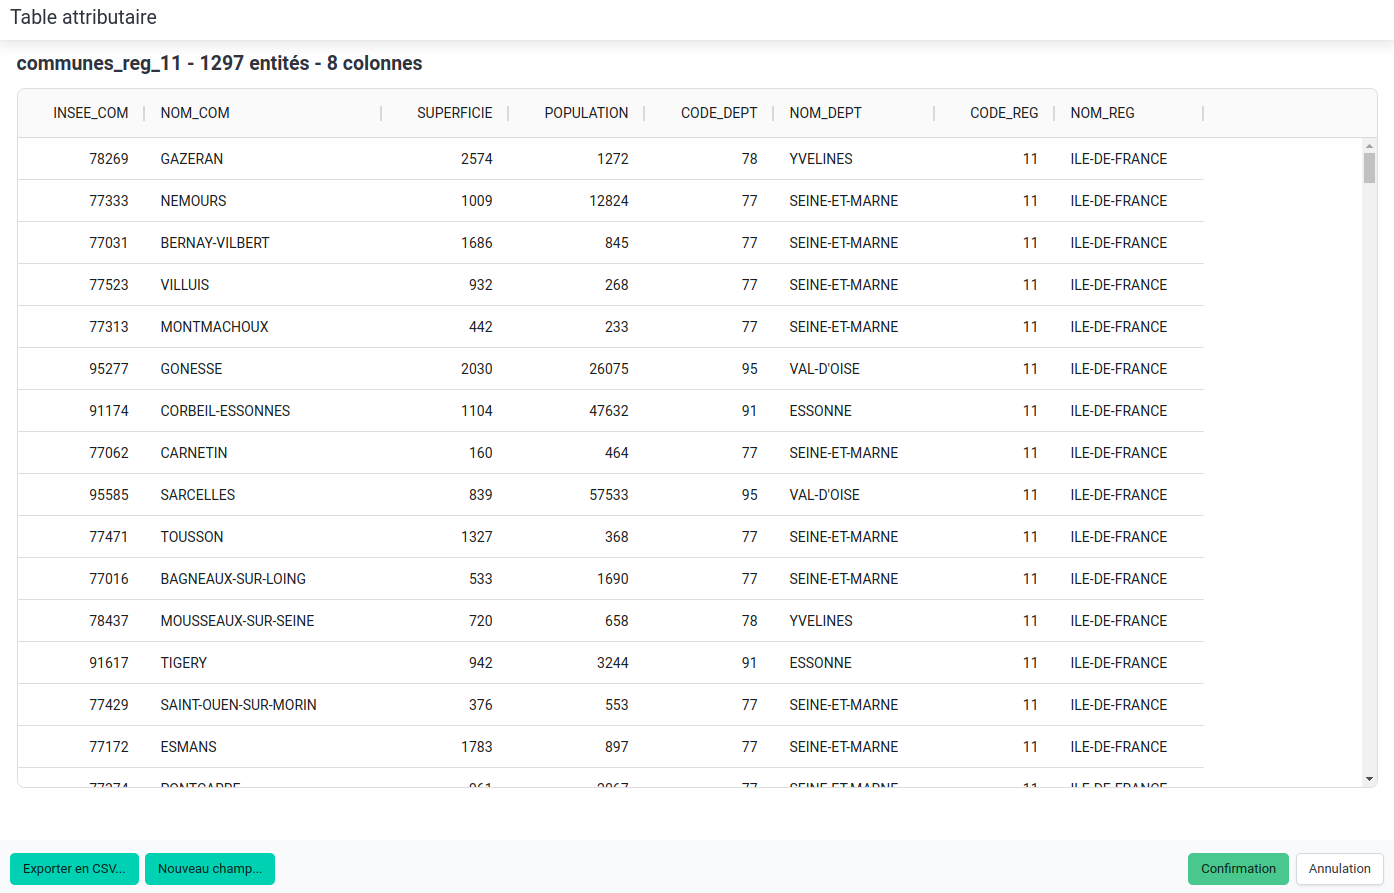
The data table is a central element of the Magrit interface. It allows the user to visualize and modify the data of each layer.
 Data table
Data modification
To modify data, double-click on a cell and enter the desired value.
Data export to CSV
You can export the data table displayed in CSV format by clicking on the "Export to CSV..." button at the bottom left of the table. With this type of export, entity geometry is not exported (if you require an export type that includes geometry, you can use the "Export" function in the left-hand menu).
Adding a new field
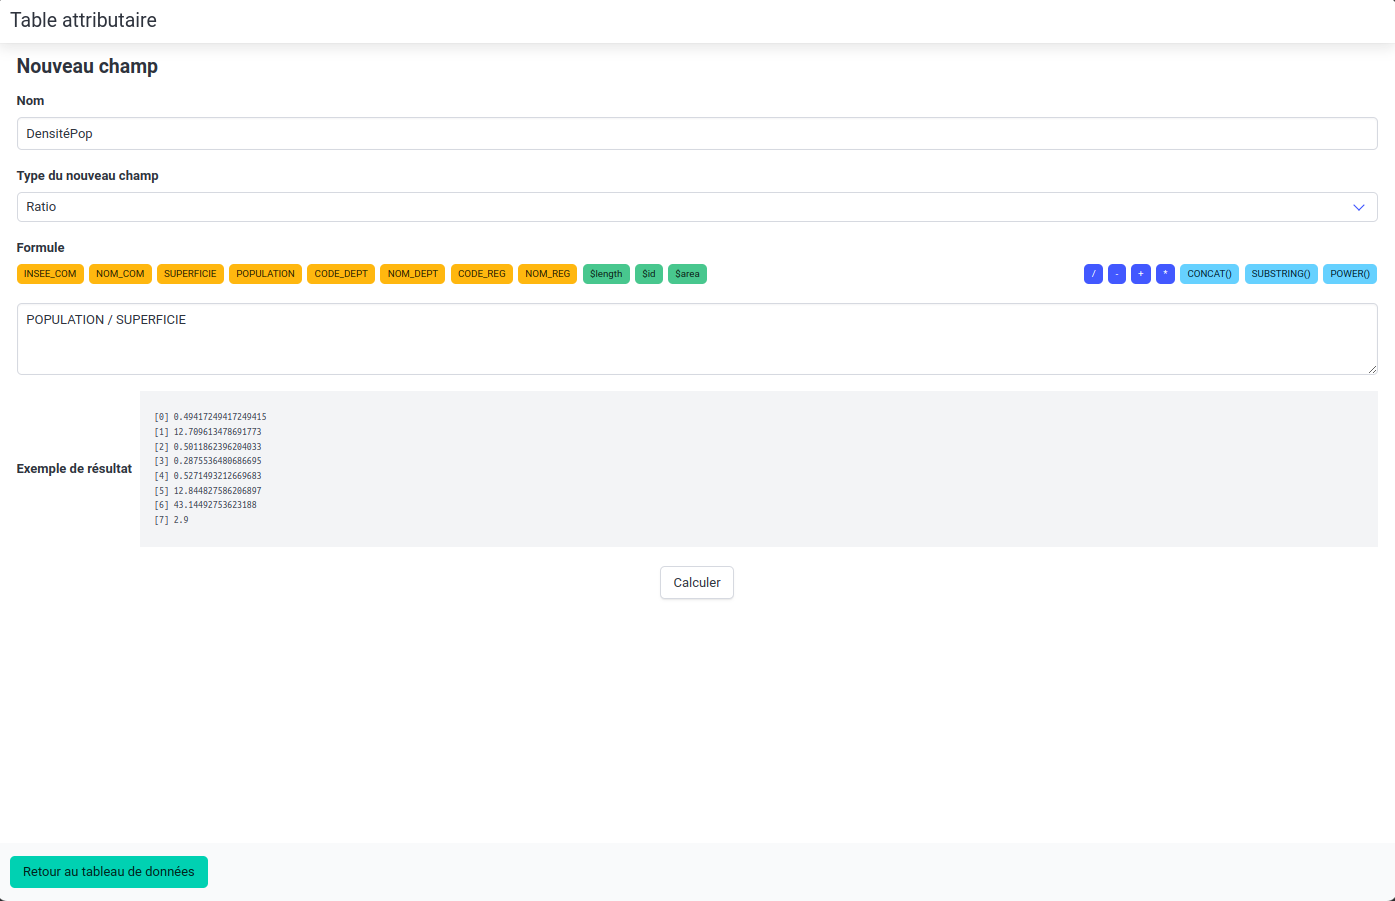
You can add a new field by clicking on the “New column...” button at the bottom left of the table.
This feature is comparable to the “field calculator” functionality of GIS software such as QGIS.
 Data table - New column
The current fields of the layer are accessible as shortcuts (yellow buttons) as well as three special fields (green buttons):
$count: the number of entities in the layer,$id: the unique (and internal) identifier of the entity,$area: the area of the entity (if it is a polygon).
Several operations are possible (some are present as a shortcut - blue buttons):
- basic mathematical operators (
+,-,*,/), - mathematical functions (
sqrt,exp,abs,round,floor,ceilandpower), - string functions (
concat,substring,lower,upper,trimandreplace), - comparison operators (
LIKE,=,!=,>,>=,<and<=), negation (NOT) and logical operations (AND,OR), - condition construction (
CASE WHEN ... THEN ... ELSE ... END).
Beware, however, of the syntax used to select entities without data: in SQL, it's common to use variable IS NULL to check if a value is absent. In Magrit, you must use NOT variable to check if a value is absent (i.e. the variable is not defined or its content is empty).
In order to create a new column, it is mandatory to specify the name of the column to be created, the data type (stock, ratio, etc.) and the calculation formula. When the formula is valid, a preview of the calculated values (first 8 lines of the table) is displayed.
 Data table - New column with valid formula
When the formula is invalid, an error message is displayed and the preview is not displayed.
 Data table - New column with invalid formula
 Data table - New column with invalid formula
Example of formula
Reclassifying quantitative data into qualitative data
Construction of formulas using conditional statements allows you to reclassify quantitative data into qualitative data. For example, to crate a new column "Type of population" based on the "Population" column with the following classes:
- "Small" for populations less than 1000 inhabitants,
- "Medium" for populations between 1000 and 10000 inhabitants,
- "Large" for populations greater than 10000 inhabitants.
CASE WHEN Population < 1000 THEN 'Small'
     WHEN Population >= 1000 AND Population <= 10000 THEN 'Medium'
     ELSE 'Large'
END
Reclassify quantitative data as qualitative (with missing values)
CASE WHEN NOT Population THEN 'No data'
     WHEN Population < 1000 THEN 'Small'
     WHEN Population >= 1000 AND Population <= 10000 THEN 'Medium'
     ELSE 'Large'
END
Extracting the departmental code from the INSEE code
To extract the departmental code from the INSEE code, you can use the substring function to extract the first two characters of the INSEE code.
substring(INSEE, 1, 2)Calculating the population density of a territory
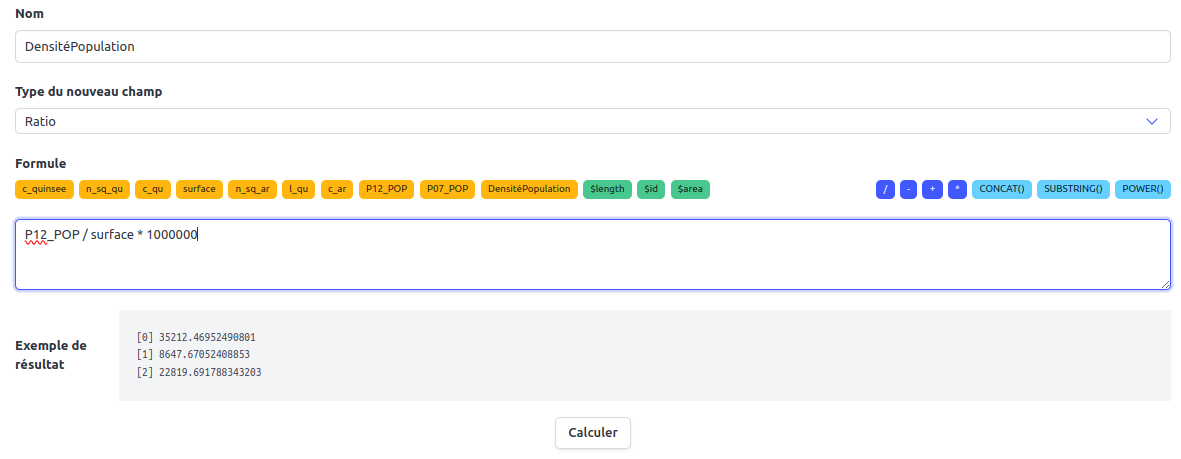
To calculate the population density of a territory, you can use the following formula:
Population / AreaLet's say that the area is in m² and you want to get a density in hab/km²:
Population / Area * 1000000Deleting a field
To delete a field, right-click on the field name and select "Delete column".
Closing the data table
When you close the data table, a dialog box will appear asking you to save the changes made to the data. It's possible to save the changes by clicking on the "Confirm" button or to cancel the changes by clicking on the "Cancel" button.